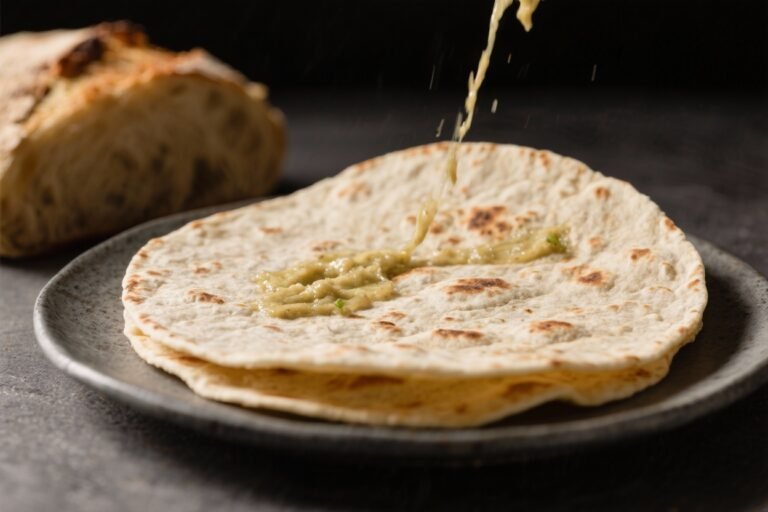
Unleavened Bread Recipe Easy: Your Guide to Quick & Delicious Flatbread
Craving fresh bread but short on time or ingredients? Look no further! This unleavened bread recipe is incredibly easy, requiring only a few pantry staples and minimal effort. Perfect for wraps, dipping, or enjoying alongside your favorite soups and stews, this flatbread is a versatile and satisfying treat that’s ready in minutes. Ditch the store-bought stuff and experience the simple joy of homemade bread with this foolproof recipe.
Why This Recipe Works
This recipe is a winner for several reasons:
- Simplicity: It uses basic ingredients that you likely already have in your kitchen. No fancy flours or complicated techniques required!
- Speed: Unlike traditional bread that requires hours of rising, this unleavened bread cooks up in a flash on the stovetop.
- Versatility: The neutral flavor of this flatbread makes it a perfect accompaniment to a wide variety of dishes. Wrap your favorite fillings, dip it in hummus, or use it as a pizza base – the possibilities are endless!
- Customizable: Feel free to experiment with different flours, herbs, and spices to create your own unique flavor profiles.
- No Yeast Required: For those who are yeast-intolerant, or simply don’t have yeast on hand, this is a perfect solution.
Ingredients
- 2 cups all-purpose flour (or whole wheat flour for a nuttier flavor)
- 1 teaspoon salt
- ¾ cup warm water (plus more if needed)
- 2 tablespoons olive oil (or any neutral oil like vegetable or canola oil)

Instructions
- Combine Dry Ingredients: In a large bowl, whisk together the flour and salt. This ensures the salt is evenly distributed throughout the dough.
- Add Wet Ingredients: Pour in the warm water and olive oil. Use a wooden spoon or your hands to mix the ingredients until a shaggy dough forms.
- Knead the Dough: Turn the dough out onto a lightly floured surface. Knead for 5-7 minutes, or until the dough is smooth and elastic. If the dough is too sticky, add a little more flour, one tablespoon at a time. If it’s too dry, add a little more water, one tablespoon at a time.
- Rest the Dough: Place the dough back in the bowl, cover it with a clean kitchen towel or plastic wrap, and let it rest for at least 15 minutes. This allows the gluten to relax, making the dough easier to roll out. You can let it rest for longer, even up to an hour, if you have the time.
- Divide the Dough: Divide the dough into 6-8 equal pieces. The number of pieces will determine the size of your flatbreads.
- Roll Out the Dough: On a lightly floured surface, roll out each piece of dough into a thin circle or oval, about 6-8 inches in diameter. Aim for an even thickness to ensure even cooking.
- Cook the Flatbreads: Heat a dry skillet or griddle over medium-high heat. Once the skillet is hot, carefully place one flatbread in the skillet.
- Cook Each Side: Cook for 1-2 minutes per side, or until the flatbread is lightly browned and puffed up in spots. You should see small bubbles forming on the surface.
- Repeat: Repeat with the remaining dough, stacking the cooked flatbreads on a plate and covering them with a clean kitchen towel to keep them warm and pliable.
- Serve: Serve immediately and enjoy!
Tips for Success
- Don’t Overwork the Dough: Over-kneading can result in tough flatbreads. Knead just until the dough is smooth and elastic.
- Use Warm Water: Warm water helps to activate the gluten in the flour, resulting in a softer and more pliable dough.
- Adjust Water as Needed: The amount of water needed may vary depending on the humidity and the type of flour you use. Add water gradually until the dough comes together.
- Hot Skillet is Key: Make sure the skillet is hot before adding the flatbreads. This will ensure that they cook quickly and evenly.
- Don’t Overcook: Overcooked flatbreads will be dry and brittle. Cook just until they are lightly browned and puffed up.
- Keep Warm: Covering the cooked flatbreads with a towel keeps them warm and prevents them from drying out.
- Experiment with Flavors: Add herbs, spices, or even a little garlic powder to the dough for a unique flavor.
Storage Instructions
Leftover unleavened bread can be stored in an airtight container at room temperature for up to 2 days. For longer storage, wrap the flatbreads individually in plastic wrap and freeze them for up to 2 months. To reheat, simply warm them in a dry skillet or microwave until heated through.

FAQ
Q: Can I use a different type of flour?
A: Yes! Whole wheat flour, spelt flour, or a gluten-free flour blend can be used. Keep in mind that the texture and flavor will vary depending on the type of flour you use. You may need to adjust the amount of water accordingly.
Q: My dough is too sticky. What should I do?
A: Add a little more flour, one tablespoon at a time, until the dough is no longer sticky.
Q: My dough is too dry. What should I do?
A: Add a little more water, one tablespoon at a time, until the dough comes together.
Q: Can I make this recipe ahead of time?
A: Yes, you can make the dough ahead of time and store it in the refrigerator for up to 24 hours. Bring the dough to room temperature before rolling it out.
Q: What can I serve with this unleavened bread?
A: This flatbread is incredibly versatile! Serve it with hummus, baba ghanoush, soups, stews, curries, or use it as a wrap for sandwiches or tacos. It’s also delicious with grilled meats and vegetables.
Conclusion
This easy unleavened bread recipe is a fantastic way to enjoy fresh, homemade flatbread without the fuss of yeast or long rising times. Its simplicity and versatility make it a go-to recipe for quick meals, snacks, and appetizers. So, gather your ingredients, get in the kitchen, and experience the satisfaction of creating delicious, homemade bread in minutes. Happy baking!