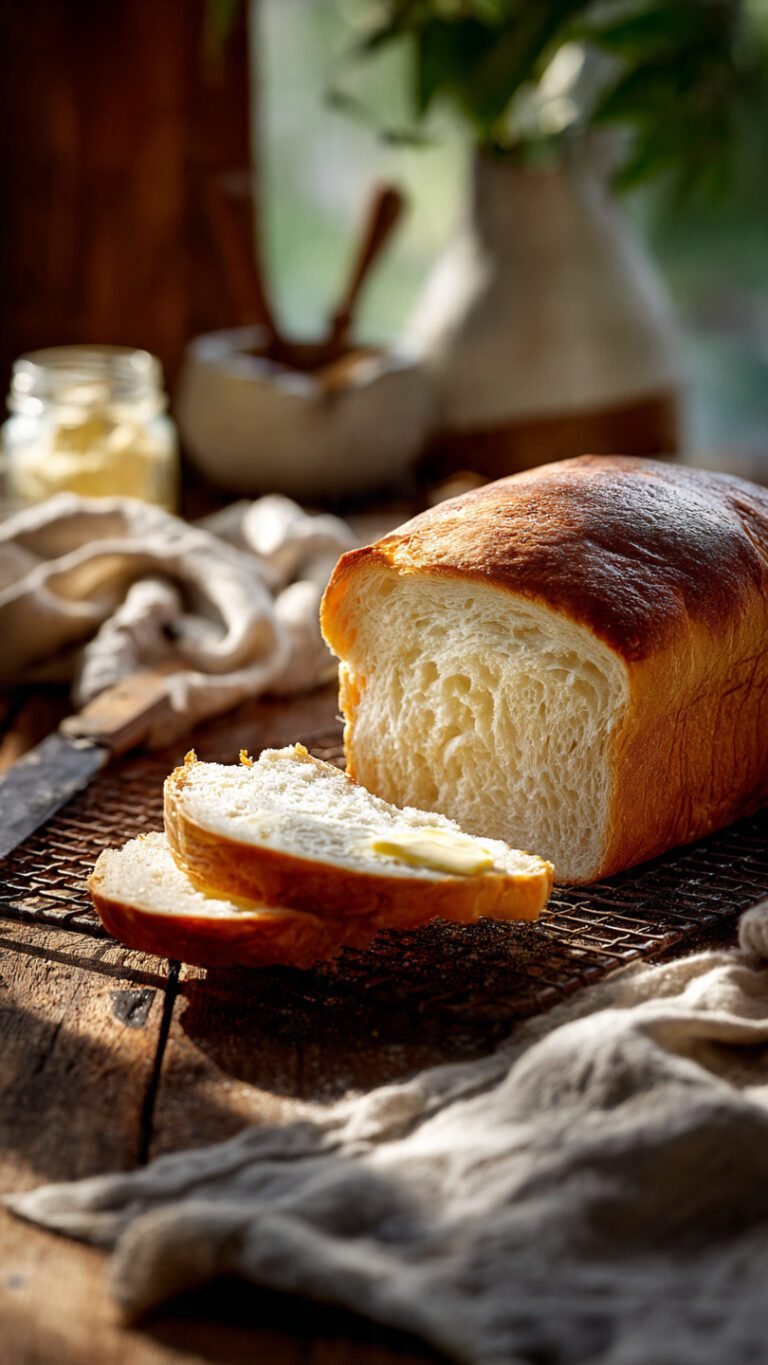
This Whole Wheat Bread Recipe Will Make Your Kitchen Smell Like a Bakery—and Your Friends Jealous
You want a loaf that slices clean, toasts like a dream, and makes store-bought bread taste like cardboard? This is it. No mystery ingredients, no fancy equipment—just you, a bowl, and a plan.
The trick isn’t working harder; it’s understanding what the dough wants. Give it a little time and a few smart moves, and you’ll have a golden loaf that looks pro and tastes even better. Your breakfast?
Upgraded. Your sandwiches? Unstoppable.
What Makes This Recipe Awesome
- Soft, sliceable crumb: Whole wheat can be dense.
This loaf uses a touch of honey and olive oil plus a quick “autolyse” rest to stay tender without turning cakey.
- High rise, no drama: Vital wheat gluten and proper hydration give you height without collapsing.
- Flavor that develops fast: A short rest and warm proofing unlock nutty, slightly sweet notes in under 3 hours.
- Beginner-friendly: Clear steps, visual cues, and options whether you have a stand mixer or just hands and hustle.
- Meal-prep champion: Stays fresh for days, freezes perfectly, and toasts like it was born for butter.
What You’ll Need (Ingredients)
- 3 1/2 cups (420 g) whole wheat flour (preferably white whole wheat for lighter texture, but regular works)
- 2–3 tablespoons (12–18 g) vital wheat gluten (optional but recommended for better rise)
- 1 1/4 cups (295 ml) warm water (about 105–115°F; warm, not hot)
- 1/2 cup (120 ml) warm milk (dairy or unsweetened plant milk)
- 2 tablespoons (30 ml) olive oil (or melted butter)
- 3 tablespoons (60 g) honey (or 2 1/2 tbsp sugar/maple syrup)
- 2 1/4 teaspoons (7 g) instant or rapid-rise yeast
- 1 1/2 teaspoons (9 g) fine sea salt
- 1 egg (optional, for richer crumb; can omit)
- 1 tablespoon milk + 1 teaspoon honey (optional for glaze)
- Butter for greasing pan (or neutral oil)
Instructions
- Bloom the flavor (optional but clutch): In a large bowl, whisk warm water, warm milk, honey, and yeast. Let sit 5 minutes until slightly foamy. If it doesn’t foam, your yeast might be on vacation—try new yeast.
- Mix the dry team: In another bowl, combine whole wheat flour, vital wheat gluten, and salt.
Stir well so the salt doesn’t hang out in one spot.
- Bring it together: Add the dry mix to the wet. Add olive oil and the egg (if using). Stir with a wooden spoon or use a stand mixer with dough hook on low until a shaggy dough forms.
- Rest for hydration (autolyse): Cover and let the dough rest 20 minutes.
Whole wheat drinks water slowly; this step keeps your loaf from turning into a brick.
- Knead to smooth: Knead by hand 8–10 minutes or in a mixer on medium-low 6–8 minutes. The dough should be slightly tacky but not sticky. If it’s wet, add 1 tablespoon flour at a time; if it’s stiff, add 1 teaspoon water at a time.
You’re looking for a soft, springy dough.
- First rise: Shape into a ball, place in a lightly oiled bowl, cover, and let rise in a warm spot until doubled, 60–90 minutes. A gently poked dent should spring back slowly.
- Shape the loaf: Turn the dough onto a lightly floured surface. Pat into an 8×12-inch rectangle.
Fold the top third down and the bottom third up (like a letter), then roll tightly from the short end. Pinch the seam closed and tuck the ends under.
- Pan it: Place seam-side down into a greased 8.5×4.5-inch or 9×5-inch loaf pan. Cover loosely with oiled plastic or a towel.
- Second rise: Let rise until the dome crowns about 1 inch above the pan, 35–60 minutes depending on room temp.
If you gently shake the pan, the loaf should jiggle slightly—technical term, yes.
- Preheat and prep: Heat oven to 375°F (190°C). For a thin, soft crust, whisk milk and honey and brush lightly over the top.
- Bake: Bake 30–35 minutes. Tent with foil after 20 minutes if browning fast.
The loaf is done when the internal temp hits 195–200°F (90–93°C) or the bottom sounds hollow when tapped.
- Cool like you mean it: Remove from pan after 10 minutes and cool on a rack at least 1 hour before slicing. Yes, waiting is pain. But slicing hot bread compresses the crumb—don’t sabotage your own work.
How to Store
- Room temp: Wrap in a clean kitchen towel or store in a bread box for 2–3 days.
Avoid the fridge—it dries bread out, FYI.
- Freeze slices: Slice, then freeze in a zip-top bag with parchment between slices. Toast straight from frozen for instant breakfast flex.
- Revive: Day-old? A quick toast or 5 minutes in a 325°F oven brings it back.
Why This is Good for You
- Whole grains = fiber: Supports digestion, steadier energy, and better satiety.
Translation: fewer snack attacks.
- Micronutrient boost: Whole wheat brings magnesium, B vitamins, and iron to the party.
- Smarter carbs: With fiber and protein from gluten, this loaf plays nicer with blood sugar than white bread (still a carb, but a better one).
- Healthy fats: Olive oil adds heart-friendly monounsaturated fats and keeps the crumb tender.
Common Mistakes to Avoid
- Water too hot: Yeast dies at high temps. Keep liquids warm, not scorching. If it’s too hot for your finger, it’s too hot for yeast.
- Skipping the rest: Whole wheat needs time to hydrate.
Without the 20-minute rest, you get dense, dry crumb. Hard pass.
- Over-flouring: Sticky dough scares people into adding cups of flour. Resist.
Aim for tacky. The dough should cling slightly, not glue your fingers together.
- Underproofing or overproofing: If the loaf doesn’t rise enough, it’ll be dense. If it rises too far and collapses, you’ll get a sad crater.
Proof to 1 inch above the pan for the win.
- Slicing hot: You’ll compress the crumb and trap steam. Let it cool—patience pays, IMO.
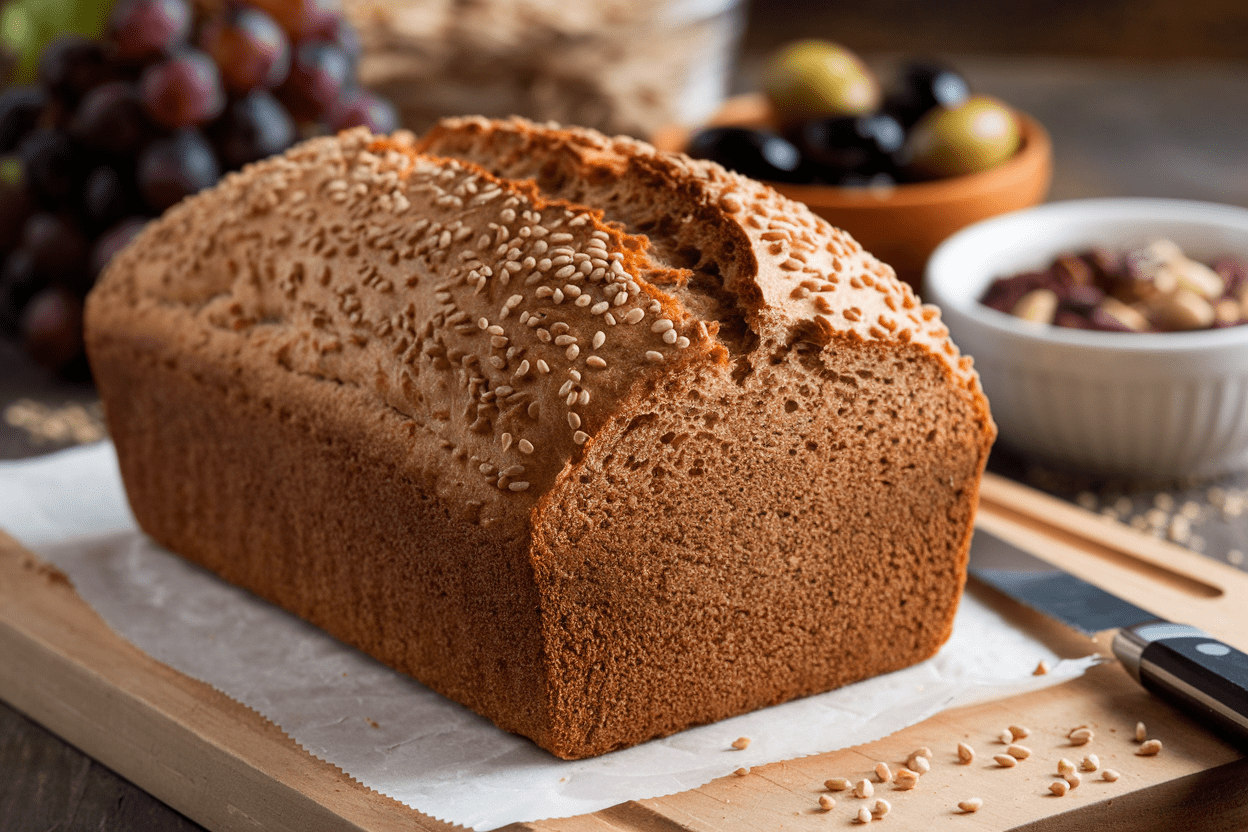
Recipe Variations
- 70/30 Blend: Use 70% whole wheat, 30% bread flour for a lighter, taller loaf with mild wheat flavor.
- Seeded Crunch: Add 1/3 cup mixed seeds (sunflower, sesame, flax). Toast them first for extra flavor.
- Oat Upgrade: Mix in 1/2 cup rolled oats and add 2–3 extra tablespoons water.
Rustic and hearty.
- Molasses Rye Vibe: Swap 1 tablespoon honey for 1 tablespoon molasses and substitute 1/2 cup of the flour with medium rye. Earthy and bold.
- Dairy-Free: Use plant milk or replace milk with water; increase olive oil to 2 1/2 tablespoons for tenderness.
- Overnight Flavor Boost: After kneading, refrigerate the dough 8–24 hours. Shape, proof, and bake the next day.
Deeper flavor, better structure.
FAQ
Can I make this without vital wheat gluten?
Yes. The loaf will be slightly denser but still great. Use white whole wheat flour if possible and don’t skip the autolyse rest.
Make sure you knead to a smooth, elastic dough and proof fully.
What if I only have active dry yeast?
Use the same amount, but bloom it in the warm water/milk with the honey for 5–10 minutes until foamy before mixing. Active dry can be a bit slower, so allow extra rise time.
How do I know I’ve kneaded enough?
The dough should be smooth, elastic, and slightly tacky. It will stretch into a thin “windowpane” without tearing easily.
If it tears right away, keep kneading in short bursts and rest the dough 5 minutes if it gets tight.
My loaf didn’t rise. What went wrong?
Common culprits: old yeast, liquids too hot, a cold kitchen, or too much flour. Check yeast freshness, keep liquids warm, and proof in a slightly warm spot (around 75–80°F).
The dough should feel soft, not stiff.
Can I bake this free-form without a loaf pan?
You can, but expect a wider, shorter loaf because whole wheat spreads more. Shape a tight batard, proof in a towel-lined bowl, and bake on a preheated sheet or stone at 400°F for better oven spring.
How do I get a softer crust?
Brush with milk-honey before baking and again right after it comes out. You can also tent with foil mid-bake and cool the loaf under a towel to trap a bit of steam.
Is this bread good for sandwiches and toast?
Absolutely.
It slices clean after cooling, stands up to spreads, and toasts beautifully. Pro tip: Freeze sliced and toast from frozen for peak weekday efficiency.
My Take
This is the whole wheat loaf I wish I’d had when I first started baking—simple steps, reliable rise, and a flavor that hits way above its effort. It’s not trying to be fancy; it’s trying to be the bread you actually eat every day.
Make it once, and you’ll understand the hype the second you cut a clean slice and watch the butter melt. Next weekend? Try the seeded version and pretend you spent $8 at an artisan bakery.
Your secret’s safe with me.