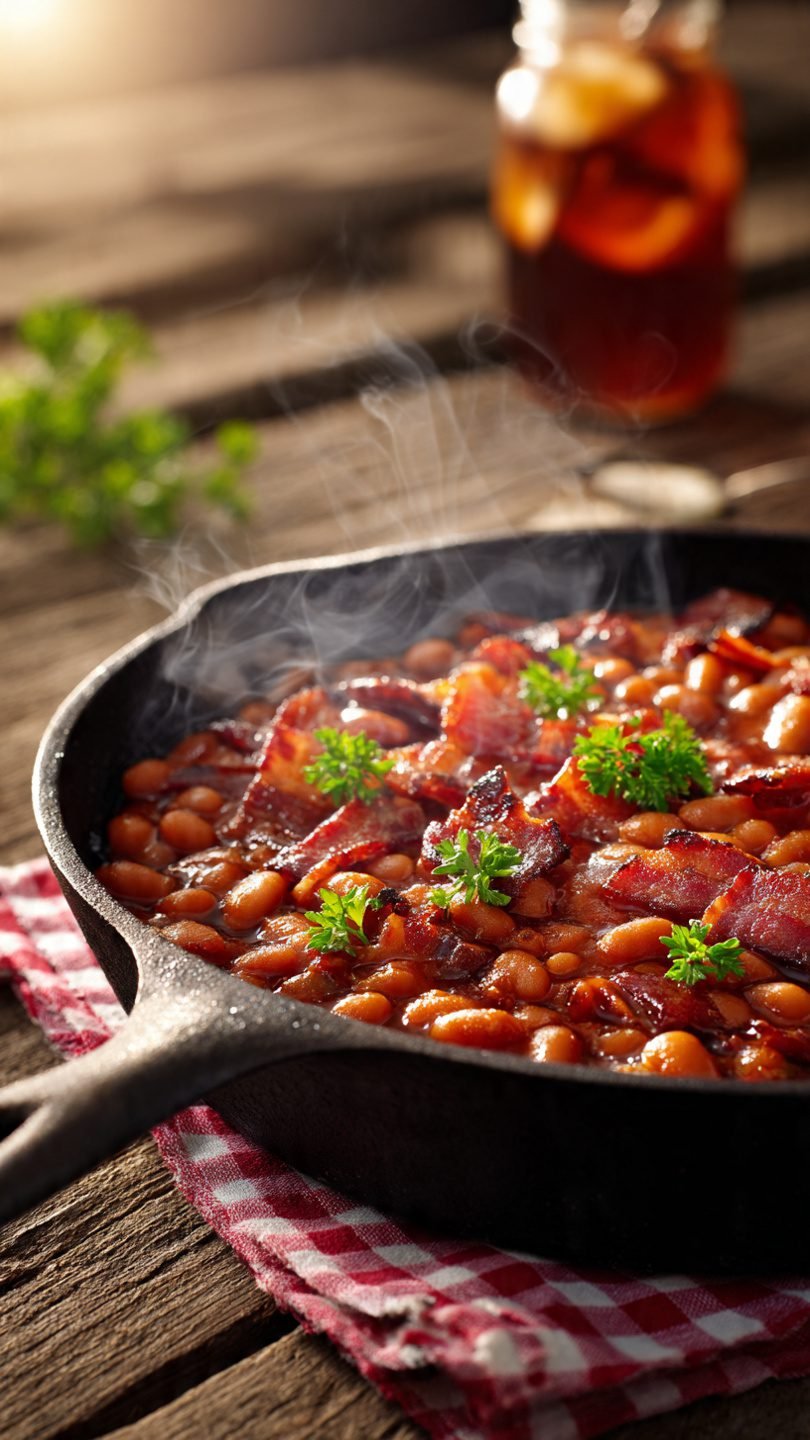
🥘 The Ultimate Canned Baked Beans Recipe (Secret Hack!)
So you’re craving something tasty but you’re way too lazy to spend forever in the kitchen, huh? Same.
Let’s be real for a second. We all have that fantasy of being the pioneer woman (or man) who soaks dried navy beans for 24 hours, simmers them for another 12 in a handmade clay pot, and serves them with a side of moral superiority. But in reality? It’s Tuesday, you’re tired, and you just want comfort food that tastes amazing without requiring a degree in hydration management.
That is exactly where this canned baked beans recipe comes in to save your life—or at least your dinner. We are going to take those humble, slightly sad-looking tin cans from the back of your pantry and doctor them up until they taste like they’ve been slow-cooked by a Southern grandmother who has been guarding her secret recipe since 1974.
Why This Recipe is Awesome
First off, let’s address the elephant in the room: canned beans have a bad reputation. People think of them as mushy, overly sweet, and kind of one-note. But that’s only because people are eating them straight out of the can like savages. Stop doing that.
This recipe is awesome because it is the ultimate “fake it ’til you make it” dish. It bridges the massive gap between “opening a can” and “cooking from scratch.” Here is why you are going to fall in love with this method:
1. The “Low Effort, High Reward” Ratio The return on investment here is staggering. You are doing about 10 minutes of active work (mostly chopping an onion and frying bacon), but the result tastes like you spent hours slaving over a hot stove. It’s a low-risk, high-reward situation, and quite frankly, that’s my favorite kind of cooking.
2. It’s a Texture Masterpiece The problem with plain canned beans is that the sauce is usually thin and watery. By adding our own thickeners (hello, BBQ sauce and molasses) and baking it, we evaporate that excess moisture. The sugars caramelize on top, creating that sticky, tacky, chewy crust that everyone fights over at the potluck.
3. The Flavor Profile is Complex (Fancy, Right?) We aren’t just making them sweet. We are building layers. We have the salty/smoky punch from the bacon, the umami from the sautéed onions and garlic, the acidity from the mustard and vinegar to cut through the sugar, and a little bit of heat to wake up your palate. It hits every single taste bud you have.
4. It’s Idiot-Proof Seriously. Even if you accidentally burn the onions a little (just call it “charred,” it’s trendy) or add too much brown sugar, it’s still going to taste better than the original can. It is a forgiving recipe that welcomes experimentation.
Ingredients You’ll Need
We are raiding the pantry for this one. Here is your arsenal for the ultimate canned baked beans recipe:
- Canned Pork ‘n’ Beans (2 large cans, approx 28oz each): Don’t get the “Baked Beans” flavor; get the plain old Pork ‘n’ Beans. They are a blank canvas. If you use the ones already flavored with “Maple” or “Honey,” it might get too sweet.
- Bacon (6-8 strips): Thick-cut is best. We need the fat to sauté the veggies and the meat for the garnish. Everything is better with bacon. That is a scientific fact.
- Yellow Onion (1 medium): Diced small. This adds texture and a savory backbone so it’s not just a bowl of sugar syrup.
- Garlic (3 cloves): Minced. Measure this with your heart. If you want 5 cloves, I won’t stop you.
- BBQ Sauce (1/2 cup): Use your favorite bottled sauce. Sweet Baby Ray’s is a classic, but a smoky hickory sauce works wonders here.
- Ketchup (1/4 cup): Adds tomato tang and body to the sauce.
- Brown Sugar (1/3 cup): Packed tight. This creates that molasses-rich depth.
- Dijon Mustard (2 tbsp): Or standard yellow mustard. We need this sharp vinegar kick to balance the sugar. Don’t skip it, or your beans will taste like dessert.
- Apple Cider Vinegar (1 tbsp): The secret weapon. It brightens the whole dish up.
- Worcestershire Sauce (1 tbsp): I can’t pronounce it, but I never cook without it. It adds that savory je ne sais quoi.
Step-by-Step Instructions
Alright, grab an apron (or don’t, I’m not the boss of you) and let’s turn these beans into a masterpiece.
1. Render the Liquid Gold Preheat your oven to 350°F (175°C). Chop your bacon into bite-sized squares. Throw them into a large cast-iron skillet or a Dutch oven over medium heat. We want to cook this until the fat renders out and the bacon gets crispy.
- Sensory Check: Your kitchen should smell amazing right about now. Listen for the sizzle—if it’s popping aggressively, turn the heat down. We want to fry, not burn.
- Pro Tip: Once crispy, remove the bacon bits with a slotted spoon and set them aside on a paper towel, but—and this is critical—leave about 2 tablespoons of that bacon grease in the pan. That is flavor. Do not wash it away.
2. Sauté the Aromatics Toss your diced onions into the hot bacon grease. Sauté them for about 5–7 minutes. We aren’t just sweating them; we want the edges to start turning golden brown. This is the Maillard reaction, and it equals flavor. Add the minced garlic in the last minute of cooking so it doesn’t burn and turn bitter.
3. The Great “Dump and Stir” This is the easy part. Pour your cans of beans (sauce and all—do not drain them!) into the skillet with the onions. Add the BBQ sauce, ketchup, brown sugar, mustard, apple cider vinegar, and Worcestershire sauce. Throw about 3/4 of your crispy bacon back in (save the rest for the pretty topping). Stir it all together gently. You don’t want to mash the beans; you just want to marry the flavors.
- Observation: The sauce will look a bit runny right now. Don’t panic. The oven will fix that.
4. The Bake If your skillet is oven-safe (like cast iron), just slide that bad boy straight into the oven. If not, transfer the mixture to a 9×13 baking dish. Bake uncovered for 45–60 minutes. Why uncovered? We want evaporation. We want the sauce to reduce, thicken, and get sticky.
5. The Rest Pull the beans out when the sauce is thick and bubbly, and the top looks slightly caramelized. Sprinkle the remaining reserved bacon on top. Let it sit for 10-15 minutes. This is crucial. Just like a steak, the juices need to settle and thicken up as they cool slightly. If you serve it molten hot, you’ll burn your tongue and miss half the flavor.
Common Mistakes to Avoid
Even though this is “idiot-proof,” I have seen some things. Here is how to avoid a bean tragedy:
- Draining the Beans: Usually, with black beans or chickpeas, we drain and rinse. Not here. The starchy liquid in the can helps thicken our sauce. If you drain them, you’ll have dry, sad pebbles.
- Skipping the Acid: If you leave out the mustard or vinegar, you will end up with “candied beans.” You need that sharp acid to cut through the heavy sweetness of the brown sugar and BBQ sauce. It’s all about balance, baby.
- Using “Pie Filling” Cans: Pay attention to the label. If you accidentally buy cherry pie filling instead of kidney beans… well, actually, I don’t even know what that would taste like, but let’s not find out.
- Thinking You Don’t Need to Preheat: Thinking you don’t need to preheat the oven—rookie mistake. If you put cold beans in a cold oven, they turn to mush before the sauce has a chance to caramelize.
Alternatives & Substitutions
Cooking is an art, not a rigid set of laws. Feel free to remix this canned baked beans recipe to fit your vibe.
- Vegetarian Friends: Skip the bacon (I know, it hurts). Use butter or olive oil to sauté the onions. To replace the smokiness, add a teaspoon of Smoked Paprika or a few drops of Liquid Smoke. It works surprisingly well!
- Spice Lovers: Slice up a fresh jalapeño and sauté it with the onions. Or, toss in a dash of cayenne pepper. Sweet and spicy is a killer combo.
- The “Fancy Pants” Add-in: Splash in a shot of Bourbon or dark rum when you add the sauces. The alcohol cooks off, leaving a rich, woody flavor that pairs perfectly with the brown sugar.
- Bean Swap: Don’t like Pork ‘n’ Beans? You can use canned Great Northern beans, Navy beans, or Pintos. Just make sure you don’t drain them all the way—maybe keep half the liquid and discard the rest if using plain brined beans.
FAQ (Frequently Asked Questions)
1. Can I make this in a slow cooker? You sure can! Sauté the bacon and onions first (don’t skip this, raw onions in a slow cooker are crunchy and weird), then dump everything into the crockpot. Cook on Low for 4–5 hours. It won’t get that sticky crust on top, but it’ll still be delicious.
2. Can I use margarine instead of butter (or bacon fat)? Well, technically yes, but why hurt your soul like that? Use butter or oil if you must, but flavor lives in the animal fat.
3. How long do leftovers last? Stored in an airtight container in the fridge, they will last 3–4 days. Honestly, they taste even better on day two because the flavors have had a sleepover and gotten to know each other better.
4. Can I freeze these baked beans? Yep! They freeze great. Put them in a freezer-safe container for up to 3 months. Thaw them in the fridge overnight before reheating.
5. My beans are too runny! What did I do? You probably didn’t bake them long enough, or your BBQ sauce was very thin. Just pop them back in the oven for another 15 minutes. The longer they bake, the thicker they get.
6. Can I use maple syrup instead of brown sugar? Absolutely. Maple syrup gives it a more earthy, autumn vibe. Just reduce the amount slightly since syrup is a liquid and we are trying to manage moisture here.
Final Thoughts
There you have it. You have successfully navigated the culinary waters of making a canned baked beans recipe that tastes like it has a rich history and a backstory.
This is the kind of dish that gets you invited back to potlucks. It’s the side dish that steals the show from the dry burgers. So, go ahead and serve it with pride. Tell them it’s an old family recipe. (Because technically, we’re family now, right?)
Now go impress someone—or yourself—with your new culinary skills. You’ve earned it!