Fudge Recipe Condensed Milk: The Easiest, Creamiest Dream!
Craving a rich, decadent treat but short on time and energy? Look no further! This fudge recipe using condensed milk is your answer. Forget complicated techniques and finicky thermometers. This method is so simple, even a beginner can whip up a batch of unbelievably creamy, melt-in-your-mouth fudge in minutes. Get ready to impress your friends, family, or even just yourself with this foolproof recipe that delivers perfect fudge every single time.
Why This Recipe Works
The magic behind this recipe lies in the condensed milk. Unlike traditional fudge recipes that rely on carefully cooked sugar syrups, condensed milk provides a stable base of sugar and dairy solids. This eliminates the need for precise temperature control and reduces the risk of crystallization, which can ruin the texture of fudge. The high sugar content of the condensed milk also helps to create a smooth, creamy consistency that is simply irresistible. Plus, it’s incredibly versatile! You can easily customize this base recipe with your favorite flavors and add-ins, making it a perfect canvas for your culinary creativity.
Ingredients
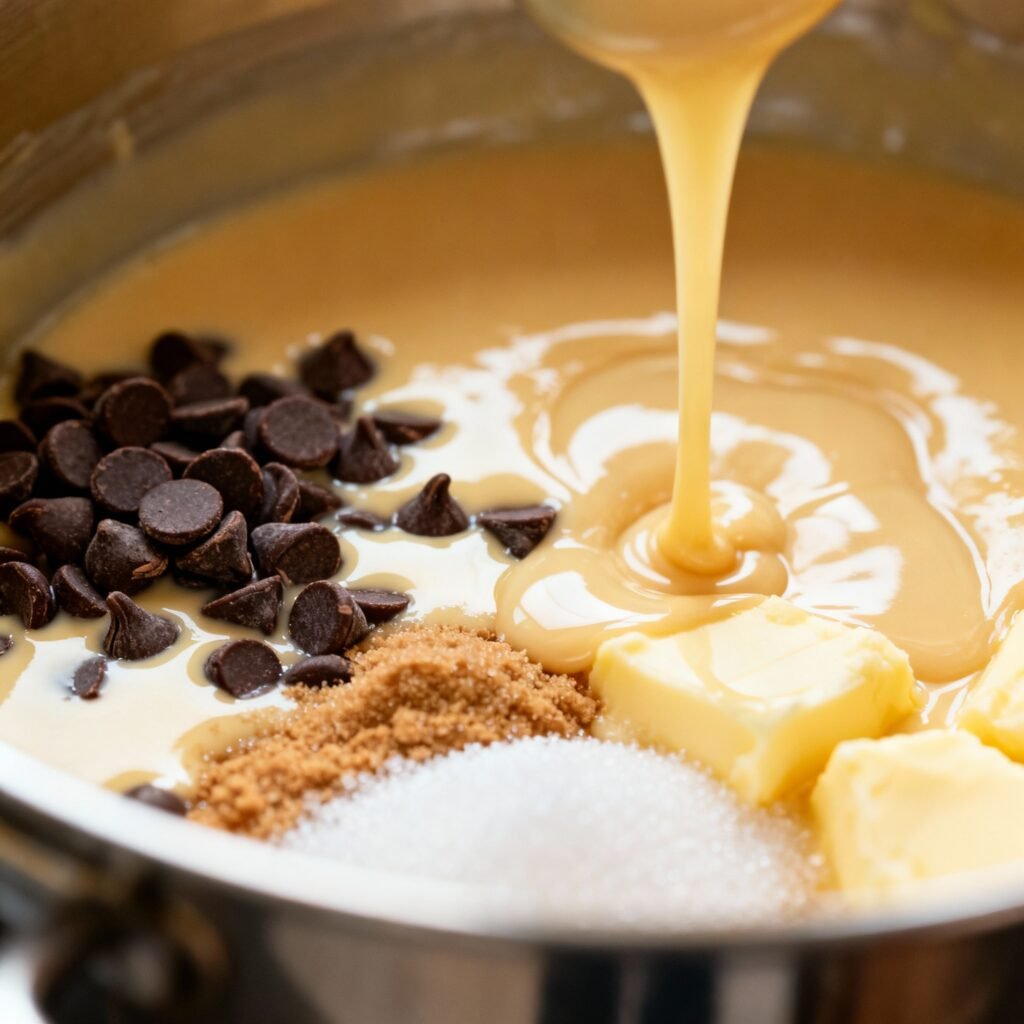
- 1 (14 ounce) can sweetened condensed milk
- 3 cups semi-sweet chocolate chips (or your favorite chocolate)
- 1/4 cup (4 tablespoons) unsalted butter
- 1 teaspoon vanilla extract
- Optional: 1/2 cup chopped nuts (walnuts, pecans, or almonds), sprinkles, dried fruit, or other add-ins
Instructions
- Prepare Your Pan: Line an 8×8 inch square baking pan with parchment paper, leaving an overhang on two sides. This will make it easy to lift the fudge out later.
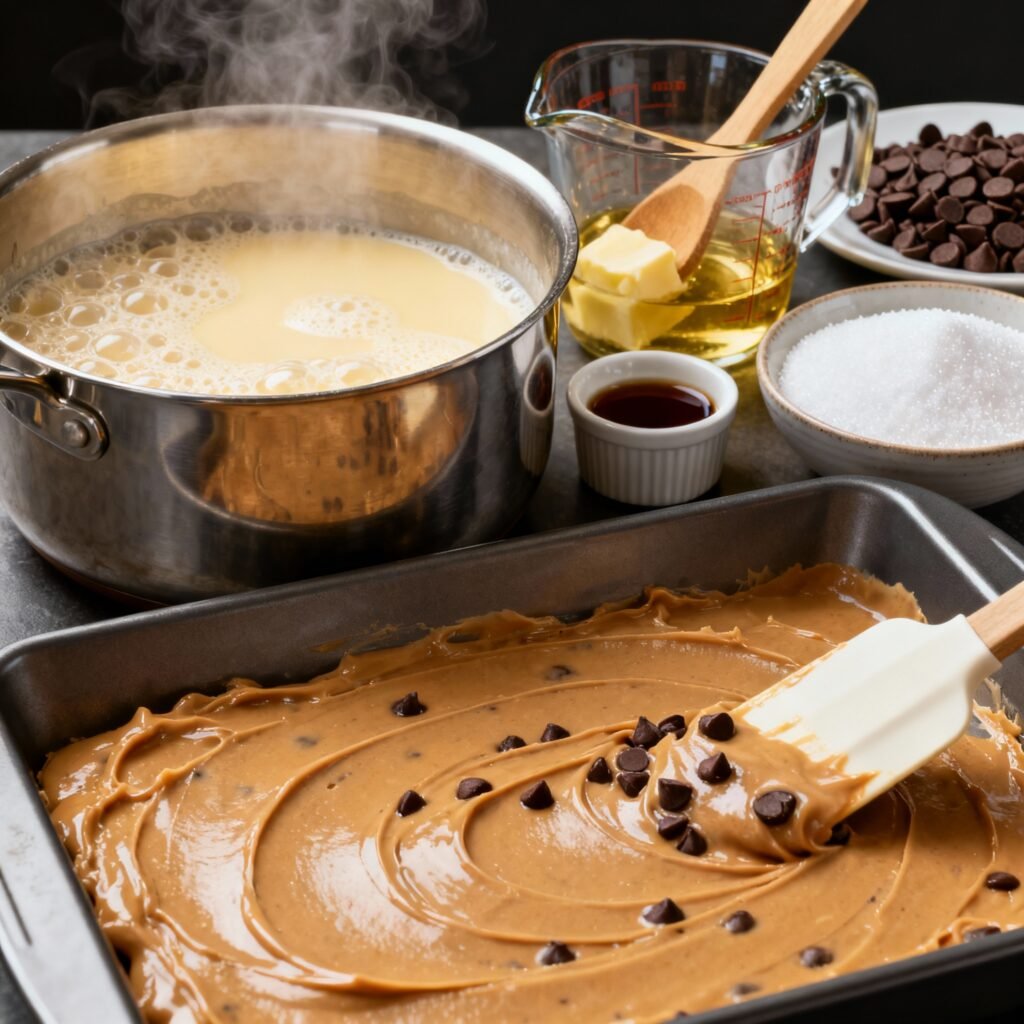
- Melt the Chocolate: In a large, microwave-safe bowl, combine the sweetened condensed milk, chocolate chips, and butter.
- Microwave in Intervals: Microwave on high for 30 seconds, then stir well. Repeat this process, microwaving in 30-second intervals and stirring after each interval, until the chocolate is completely melted and the mixture is smooth. Be careful not to overheat the chocolate, as it can burn.
- Stir in Vanilla and Add-ins: Once the chocolate is melted and smooth, stir in the vanilla extract. If you’re adding any nuts, sprinkles, dried fruit, or other add-ins, gently fold them in now.
- Pour into Pan: Pour the fudge mixture into the prepared baking pan and spread it evenly with a spatula.
- Chill and Set: Cover the pan with plastic wrap and refrigerate for at least 2 hours, or preferably overnight, to allow the fudge to set completely.
- Cut and Serve: Once the fudge is firm, lift it out of the pan using the parchment paper overhang. Place it on a cutting board and cut it into squares. Enjoy!
Tips for Success
- Use Quality Chocolate: The quality of the chocolate you use will directly impact the flavor of your fudge. Opt for a good quality semi-sweet chocolate for the best results. You can also experiment with other types of chocolate, such as milk chocolate, dark chocolate, or white chocolate.
- Don’t Overheat the Chocolate: Overheating the chocolate can cause it to seize up and become grainy. Microwave in short intervals and stir frequently to ensure even melting.
- Stir Thoroughly: Make sure to stir the chocolate mixture well after each microwave interval to prevent hot spots and ensure that all the ingredients are evenly combined.
- Get Creative with Add-ins: This recipe is a blank canvas for your creativity! Experiment with different add-ins to create your own signature fudge flavor. Some popular options include chopped nuts, sprinkles, dried fruit, marshmallows, peanut butter chips, and crushed cookies.
- Line the Pan Properly: Lining the pan with parchment paper is essential for easy removal of the fudge. Make sure to leave an overhang on two sides so you can easily lift the fudge out of the pan.
- Chill Completely: Allow the fudge to chill completely in the refrigerator before cutting it. This will ensure that it is firm and easy to cut into clean squares.
- For a smoother texture: Consider using a double boiler instead of a microwave. This provides more gentle and even heating.
Storage Instructions
Store leftover fudge in an airtight container at room temperature for up to 1 week, or in the refrigerator for up to 2 weeks. For longer storage, you can freeze the fudge for up to 2 months. Wrap the fudge tightly in plastic wrap and then place it in a freezer-safe container. Thaw the fudge in the refrigerator overnight before serving.
FAQ
Q: Can I use a different type of chocolate?
A: Absolutely! This recipe works well with milk chocolate, dark chocolate, white chocolate, or even a combination of different chocolates. Just be aware that using a sweeter chocolate like milk chocolate will result in a sweeter fudge.
Q: Can I make this recipe without a microwave?
A: Yes, you can melt the chocolate using a double boiler. Place the chocolate, condensed milk, and butter in the top of a double boiler set over simmering water. Stir constantly until the chocolate is melted and smooth.
Q: My fudge is too soft. What did I do wrong?
A: The most common reason for soft fudge is not chilling it long enough. Make sure to chill the fudge for at least 2 hours, or preferably overnight, to allow it to set completely. You may also have used too much butter or not enough chocolate. Review the recipe and ensure accurate measurements.
Q: My fudge is grainy. What happened?
A: Grainy fudge is usually caused by overheating the chocolate or allowing sugar crystals to form. Be careful not to overheat the chocolate and stir the mixture frequently to prevent crystallization. Ensure the condensed milk is fresh.
Q: Can I add peanut butter to this recipe?
A: Yes! You can add about 1/2 cup of peanut butter to the mixture along with the vanilla extract. For a marbled effect, swirl melted peanut butter on top of the fudge before chilling.
Conclusion
This condensed milk fudge recipe is a game-changer! Its simplicity and foolproof nature make it the perfect dessert for any occasion. Whether you’re a seasoned baker or a kitchen novice, you’ll be amazed at how easy it is to create delicious, creamy fudge that rivals store-bought versions. So, gather your ingredients, get ready to indulge, and enjoy the sweet satisfaction of making your own homemade fudge!